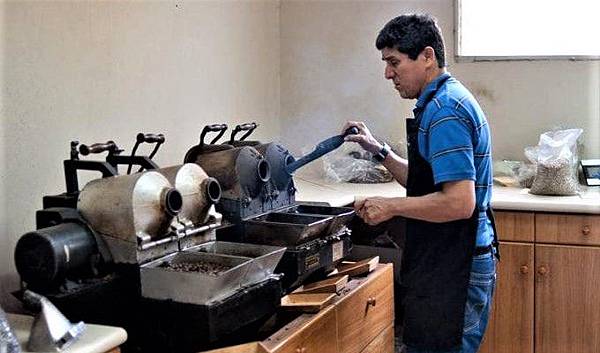
咖啡樣品豆的烘焙指南
一直以來,市場上不斷的有業者(無論專業或業餘)都過度的強調杯測,討論杯測,甚至”賣”杯測.無意批判,否則必定惹人厭,絕對討人嫌.但還是會想說…,”杯測”其實不是小規模咖啡業者,更不是消費者需要去碰的”絕技”,『杯測』是整個咖啡產業發展過程中,大型咖啡公司的『尋豆師』或『國際採購人員』在產地”挑貨”,為了不踩到地雷,必須在很短的時間,用很方便的方式檢視咖啡生豆中是否帶著令人不愉悅的瑕疵風味,並判斷每一批次的生豆品質,用來作為採購數量的參考依據而發展出來的"絕技",一般而言,每一家大型咖啡生豆公司國際採購人員都必須身懷此絕技,因為這關係到下單採購後的市場反應以及公司的利潤…

剛剛看到一篇由Sierra Burgess-Yeo發表Perfect Daily Grind有關杯測前樣品豆烘焙的文章,簡明扼要,雖然針對的是”樣品豆”烘焙指南,但其中一段00:00~09:30的烘焙流程很值得對咖啡烘焙有興趣的朋友參考…
簡單摘要如下:
作者一開始就提到,雖然你的烘焙流程(烘焙曲線)取決於你預設的烘焙結果,但如果你想要檢測咖啡的品質,最好是用一種穩定(或固定不變)的烘焙手法,否則你很難準確的檢查或比較出你的樣品豆品質…
一般來說,在經過瑕疵豆的挑選,烘焙機器預熱後,烘焙流程大約是這樣的:
00:00:烘焙機器預熱後,生豆倒入滾筒,並啟動計時器.
01:00~01:30:應調高烘焙溫度並降低氣流,在”回溫點”階段,爐內的咖啡生豆溫度會開始上升…
03:00:生豆中的水分會適度地從豆心冒出,需要讓這些水分從爐內抽出…
03:30:適時的檢查咖啡生豆顏色,一般而言會在這時候開始轉變成淡淡的黃色…
04:00:爐內的生豆顏色必定轉黃,此時的生豆含水量會從一開始的10~12%脫水至1.5%左右,並且開始進入”褐變反應(browning) “或”焦糖化反應(caramelization) “…
06:30~07:30:此時你會開始聽到第一階段的爆聲(不同的豆子出現的時間會不同).如果可以,檢查一下咖啡豆此時的味道是需要的,如果有必要,你可能需要加大氣流將剩餘的水蒸氣或煙燻味帶出烘焙室,這可以減少咖啡豆出現不好的焦味…
08:00~09:30:第一階段的爆聲後的90~120秒,你可能會想要結束樣品豆的烘焙(下豆)…
Sample Roasting: The Process
While your process will depend on your goals, if you want to evaluate and compare green coffee quality, one of the most important things you can do is roast consistently. After all, you can’t accurately compare two coffees if one is much more developed.
This means that controlling all elements of the roast is key, from monitoring airflow, gas, and time to ensuring the green samples are accurately weighed and labelled. You don’t want to get your coffees (and data) mixed up down the line!
And don’t forget to visually assess the green coffee for defects before proceeding with the sample roast.
According to my interviewees, a typical sample roast on a traditional drum roaster (more on that to come!) may look something like this:
0:00: When the roaster has heated up, the green sample is loaded into the drum and the timer started.
1:00–1:30: The temperature of the roasting chamber should be increased and airflow lowered. The temperature of the green coffee itself is starting to rise during this “turn-around phase.”
3:00: Water from within the green coffee is escaping and needs to be released, or channelled, out of the roaster.
3:30: A colour check is usually conducted: the beans should be turning yellow between 3:00–4:00.
4:00: The coffee is definitely yellowing. Its moisture content has dropped to about 1.5% from the 10–12% water content at the start of the sample roast, and “browning” or “caramelisation” (the visible impact of the Maillard reaction) is taking place.
6:30–7:30: Depending on the coffee, you will start to see and hear the signs of first crack. It is useful to do a quick aroma check, if possible, to spot any signs of scorching. You will probably need to increase your airflow to channel any remaining steam or smoke out of the roaster. This prevents it from affecting the taste of the roasted coffee.
8:00–9:30: About 90–120 seconds after first crack, you’ll want to conclude the sample roast. Even if you normally roast to second crack, you should finish sooner when you’re roasting to evaluate green coffee quality. Keep the temperature constant to prevent stalling.
Finally, switch the roaster off and release the beans into the cooling tray. Now, the coffee can be analysed. You may want to consider colour spectrometry and roast weight differences as well as cupping.
原文出處: https://www.perfectdailygrind.com/2018/08/roaster-basics-a-guide-to-sample-roasting/
(圖文彙整/咖啡舖子Ryan Chien 2018/11/26)


 留言列表
留言列表


